
Get Photos and Videos off of Your Smartphone

These days, most of us walk around with a fantastic camera in our pocket. Your smartphone has capabilities that tower over many cameras that cost thousands of dollars just a few years ago! While they may not have the ability to keep up with today’s high-end DSLRs, a smartphone is how most people document their lives these days. No matter what, the best camera on the planet is the one you have with you, so snap away with your smartphone.
If you had the foresight to buy a phone with a large storage capacity, then you might not run into a storage issue for a while. But eventually, you will find yourself with a phone that is bogged down with home photos and videos. I’ve known people who were literally deleting old photos so they could take new ones a moment later. There is no reason to be in this situation (or even worse lose your phone completely and lose all of your photos)!
Don’t worry, moving your media off your phone is not hard and sounds much more intimidating than it actually is. You can skip to the step-by-step list at the bottom if you don’t want the details.
Dropbox
The tool I suggest for this process is Dropbox. The beauty of Dropbox is that you don’t have to worry about wires or expensive programs – it just works. And once you get it set up for the first time, it will continue to work for you for as long as you want without needing much of anything from you. Dropbox has both paid and free versions. I will show you a few ways to earn free storage but if you want to skip these steps you can purchase an upgraded account. Dropbox is a very powerful service that is used for many things other than camera uploads – read my Dropbox post here.
(Optional) Earn Free Storage
Step one to earning free storage is to follow this link to create an account and get a bonus 500 MB! (Full disclosure, this link is a referral link from my account)
Step two is to complete the various tasks found at this link https://www.dropbox.com/getspace
Referrals will be your big way to earn storage (up to 16 GB!) in the long term, but you are counting on people to sign up and install the program to their computer. This option is not going to be a huge benefit to the immediate task at hand (getting photos/videos off your phone). But you should try to get these referrals because they will eventually be a big help.
The main thing to remember is that Dropbox honors their extra storage no matter what you do after you earn the storage. If you get free space and then reverse whatever you did, you still keep you free space expansion! Same thing with the options on social media. Thanks Dropbox!
Account Set-Up
Once you have a Dropbox account, you need to download their program onto your computer and their app to your smartphone’s operating system.
Computer Version
iOS Version
https://itunes.apple.com/us/app/dropbox/id327630330
Android Version
https://play.google.com/store/apps/details?id=com.dropbox.android
Windows Phone Version
http://www.windowsphone.com/en-us/store/app/dropbox/c6ac78a7-6bab-492a-827f-f21b8f3195ae
How To
Once your programs are installed, you need to sign in to them with your account info. (At this point you should be on a reliable Wi-Fi network and your phone should be plugged in.)
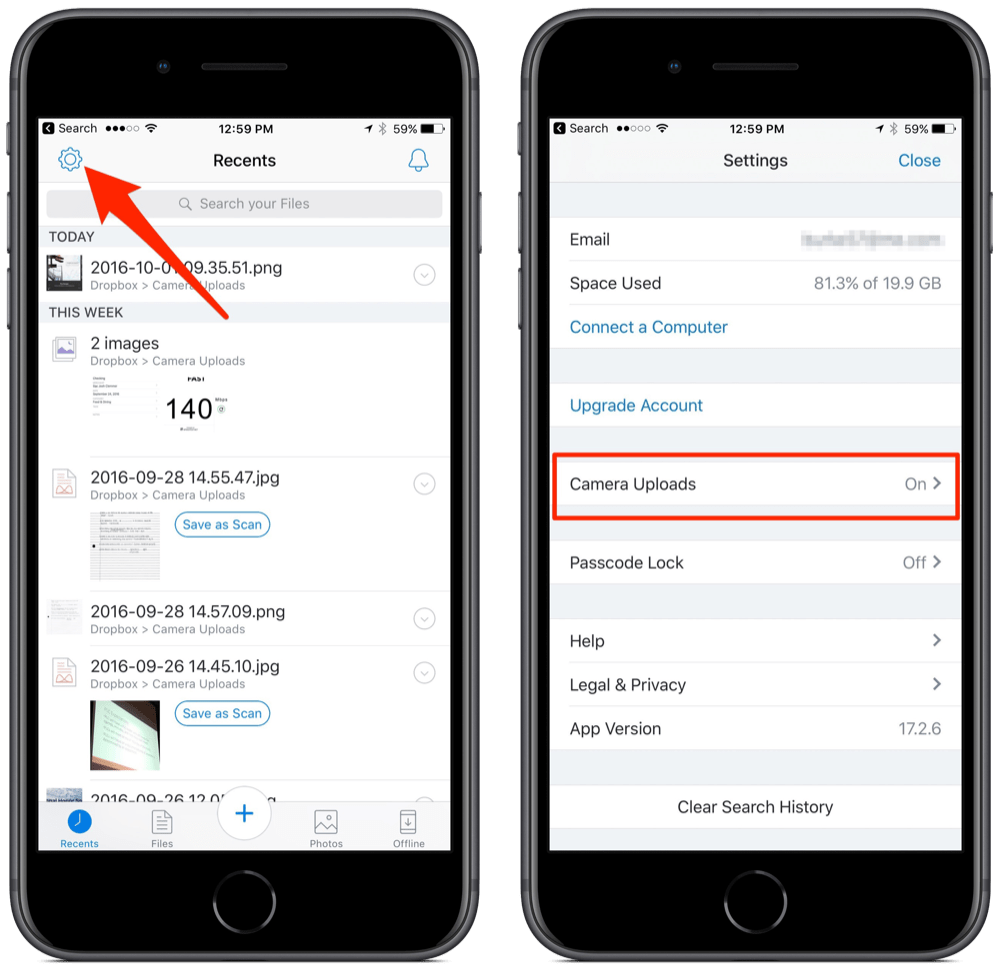
When you sign in to your Dropbox app on your phone, it will likely prompt you to activate camera upload. You want to say yes to this. If you do not get the camera upload prompt, then you want to open the settings menu in the Dropbox app and toggle the camera upload option. (See Below)
At this point, the Dropbox app will search your phone and start copying every photo and video it can find on your phone to your Dropbox account. At this time, your Dropbox account will take care of everything for you. One by one, the files are copied to Dropbox.com and then (and this is the great part) your computer will start downloading the photos as they show up on your Dropbox account.
From here you just make a folder on your computer (not in your Dropbox folder) and start to cut and paste the files from your Camera Uploads folder (inside of your Dropbox folder) to your new photo archive folder on your computer. If you are using a free account, it is important to move the files out of your Dropbox folder to your hard drive, without doing this, your free account will fill up faster than your phone gets emptied. If you bought an upgraded account, then you don’t have to worry. Depending on your situation, the free method might require a little bit of work from you in the beginning to initially empty your phone, but soon it will be very low maintenance (emptying out your camera uploads folder once every other month or so).
Summary
- Sign up here for an account with Dropbox
- Download Dropbox to your computer
- Download Dropbox app for your smartphone
- (Optional) Buy extra storage/earn extra storage for free
- Make sure that your phone is on your Wi-Fi network and is plugged in.
- In the settings menu of the Dropbox app, turn on the camera upload option.
- Wait
- While you are waiting, create a new folder on your computer to be the final destination for your media.
- As your Dropbox account fills up, cut and paste your media out of the Camera Uploads folder in your Dropbox account to the new folder you created in step 7.1.
- Delete the photos off your phone that have been uploaded to Dropbox.
- Add a reminder to your calendar to repeat steps 8 and 9 every month or two.


Leave a Reply
Want to join the discussion?Feel free to contribute!